Showing posts with label 1972 Triumph Bonneville Project T120 Vintage OIF. Show all posts

Friday, January 21, 2011

Wow, a pile of parts is turning into...

a motorcycle! A few missing bolts are being ordered - had them but lost them (never fails). I mounted the Boyer power box (which eliminates the zener diode, the condensers and rectifier) under the battery tray. This box eliminates the need for a battery all together, but the battery helps when starting the bike so I'm keeping it. Spring can't come soon enough!


Tuesday, January 18, 2011

Bonnie is coming together!

Got the rear wheel on, front forks rebuilt and on, headlight, clocks, chain etc... Next up, front wheel, wiring and carbs. plus a laundry list of little things that need to be buttoned up.

Friday, January 14, 2011

Timing gears lined up, oil lines hooked up. slight snag.

One step forward, two steps back. I hooked up the oil lines and with oil in the reservoir, I kicked it over hoping to see oil entering the rocker boxes. Nothing. I'm worried that because the guy who owned this bike prior to me, powder coated the oil feeds to the rocker boxes and they may not be lining up properly.

Snag number two: It appears that the Gear box cover is from an early 60's unit and has no oil plug. Where does the oil for the gears go? Plus the bottom gearbox cover screw wont go in. It's also missing the dowel that lines it up on the inside. that is probably the reason it won't go together. My dilemma  is since the covers were all chromed (poorly) do I buy a later gearbox cover and chrome it? At that point I'd probably want to re-chrome the  others since their already pealing. Remind me to never buy someones halfway finished projects ever again...


Thursday, January 6, 2011

Trying to shoehorn the engine back in the Bonnie

I wrestled the motor into the frame while on it's side. I couldn't seem to get the front engine mounts to line up with the bolt hole in the engine, so I attached the back side brackets loosely and righted the bike. Still no luck. I got the engine tightened up hoping the back side brackets would line up the front but still no luck. I loosened all the mounting bolts to see if I could wiggle the engine into alignment and guess what... No dice. This is probably a two man job. After 2 hours of sweating and swearing, I called it a night. The motor looks nice back in the frame though!


Thursday, December 30, 2010

Push Rods are in, clearances are set

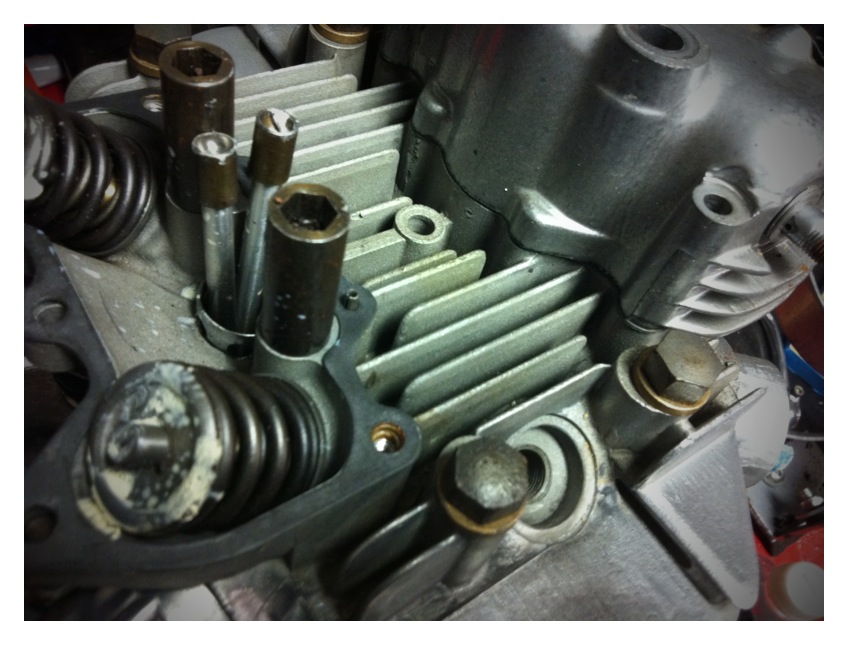
After wrestling with seating the push-rods into the tappets for another half hour, I finally got them in. I reset all the bolts to 10lbs of torque and set my valve clearances to .05mm inlet and .10mm exhaust. Gaskets are en-route, so once they arrive I can button the engine up, and reinstall it into the frame.

Wednesday, December 29, 2010

Dealing with the known problems

One of the issues I discovered back in the summer right before I parked this project, was the fork stanchions were mangled and stripped at the top, preventing the fork nuts from catching a thread. I ordered new stanchions but never installed them because right after that I found the sand in the oil reservoir. I laid everything out, pulled the guts out of the old stanchions, assembled the new set but decided new fork seals were in order. I ordered them as well as a handful of other bits I need to finish this bike up. The other issue was in the inlet rocker box. One of the push-rods was not seated on the tappet. I pulled the cover off and found the push rod wedged between the tappet and the base of the tube. There was also a nice gouge in the metal rocker cover which I ground down to avoid rubbing against the rocker arms. These things are a pain in the rear to get back together. The BSA A65 is so much easier to see what your doing. I successfully got the push rod into place but not before the other jumped out. I decided to call it a day since it was getting late and the dogs needed dinner.


Tuesday, December 28, 2010

Triumph Bonneville Update

I bought this bike back in April of 2010. It was advertised as a 99% complete restoration. Powder coating, chrome, rebuilt engine, just needed a seat and a few bits to get it finished. The guy said he needed money and at 2500, it seemed like a steal. I saw it at night and it looked great...

Over the next few days I found chipped and peeling chrome, chipped and "orange peeled" powder coat, areas where grey powder was used without cleaning the black out of the gun leaving a dirty look to the finish etc... After finding the oil reservoir was full of sand blast grit, this project went on the back burner. I tried and tried to flush the sand out of the frame but it just kept coming. This week I've had some time off so I broke down the bike, pulled the engine and did what I should've done from the get go, a complete teardown and rebuild. I flushed the frame with an auto-parts washer at different angles for 24 hrs, than rinsed it with water until I didnt see anything coming out of the frame. After that I rinsed it another 5 times. I quickly dried it with compressed air to avoid rust and it's ready to go.

As for the frames powder coat,I decided to touch up the areas by removing any rust from the bare spots with sand paper, cleaning with acetone, and using some gloss black touch paint and clear coat. Its barely noticeable and I'm so over the fact that this isn't the show bike I thought i was buying last spring. 


Thursday, August 12, 2010

Project 72 Bonnie update

After making the horrifying discovery that the entire inner frame (where the oil is contained) was loaded with sand blasting grit and old oil, I put the 72 Bonnie on hold and went out and bought the 2010 Bonnie. Since then, I've been putting many miles on my moto and not worrying about wrenching on the wretched wrecks.... well that may be a bit harsh, but broken bikes aren't fun when you work long and hard on them and they stay broken, you know?

So with the 72 partially in pieces, it has remained in my old garage, the oil chamber soaking in a powerful degreaser. I moved more than half of what was in my old garage to my new shop, but it still seems like theres no room to work. How'd I ever fit everything in here?

(l-r 61 Triumph t-20 Cub, 74 Vespa 150v Sprint, 72 Triumph t120 Bonneville, Prewar Western Flyer bicycle.)

Below is a little tool I rigged up using a long plastic bristle brush with the handle clipped to fit a drill. I periodically have been using this to scrub in the inside of the frame to clean the oil and sand. I had the front wheel off the bike with the frame leaning forward to allow the degreaser in the upper oil chamber.


Today I dropped the oil filter and drained the degreaser out of the frame. All that black you see is oil stained blasting grit. There was quite a bit of it.


Above you can see where I wiped my finger. thats all sand.


Safe to say I will be needing a new filter. Even when I am satisfied with the cleaning of the frame, I need the best filter available to keep any rogue grits of sand from working there way into the engine.


I have a way to go on this bike, but things are moving again. I'm putting the front wheel on the bike so I can roll it over to the new shop and get it on the lift. Next step will be taking apart the top end to see why one of the push rods is stuck. Seriously.

Saturday, June 26, 2010

Front fork problem


I pulled the front end apart since all the rubber bushings were shot (handlebar eyelets and headlight mounts). I also wanted to add some gaitors to the forks. Well I have no idea if these were assembled correctly to begin with but the one spring is way high

Uploaded by www.cellspin.net


Thursday, May 20, 2010

Rebuilding Lucas handlebar switch


#@%!, still waiting on a few key parts to really get this bike back together. In the meantime, I have been working on small projects (though there are no unimportant ones). The Control Switch for the left side had no bullet connectors and the button springs were shot. I ordered new bullets and springs and hit the casing on the polishing wheel. Not bad:


Monday, May 17, 2010

Triumph bits are all in. 1st job: Amal Carb rebuild


The last of the missing pieces for the 71 Bonnie arrived today (well I hope I have everything now...) I decided to start with the carbs, run the cables to the bars, attach all other cables, oil/fuel lines and finish up the wiring. While waiting for some Amal parts I got restless and started polishing up some of the pieces. I realize they'll tarnish quickly but what-evs. I didn't polish the main body of the carbs because they're just too many hard to reach spots.

I only got about 15 minutes into the rebuild before I received an emergency phonecall from a customer. So this is where I am right now. Hopefully I'll have some more time this week. Check back for updates.

Wednesday, May 12, 2010

Polishing bits for the 72 Bonnie


I know these will tarnish quickly, but I couldn't resist throwing the Amal carb pieces under the polishing wheel. Wow that cover looks great!! Have to do more.... They almost look took pretty to fill with gasoline.

Still waiting on a couple little pieces before final assembly of the bike - but when that last crucial shipment arrives I'll be burning the midnight oil (as my friend Chris always says) till I get her running! Triumph Come Home Rally is rapidly approaching.

Uploaded by www.cellspin.net


Tuesday, May 4, 2010

Hmmm, this could be a prblem


It appears that there's a considerable ga between the frames engine mount and the engine. I hope this doesn't mean the frame was bent in a wreck. Also this needs to be a sug fit.

Uploaded by www.cellspin.net


Saturday, May 1, 2010

New bike, another project!


Picked up this beautiful 72 Bonnie from a vintage bike collector in Levittown (more on his cool bikes coming soon). The bike is 85-90% rebuilt chromed and painted so I'm making a list of what I need to complete her and ordering everything this week.

Uploaded by www.cellspin.net


Friday, April 30, 2010

New conical wheel rebuild part 1


I've decided that to be a truely great bike builder (someday) I should really know how to build and lace wheels. The front wheel on my BSA is rough, but I don't want to take it off and lose riding time. This wheel came from oley for $40. Looks rough? Yup. I am going to make this into a beauty.....

Uploaded by www.cellspin.net