Friday, January 14, 2011

Timing gears lined up, oil lines hooked up. slight snag.

One step forward, two steps back. I hooked up the oil lines and with oil in the reservoir, I kicked it over hoping to see oil entering the rocker boxes. Nothing. I'm worried that because the guy who owned this bike prior to me, powder coated the oil feeds to the rocker boxes and they may not be lining up properly.

Snag number two: It appears that the Gear box cover is from an early 60's unit and has no oil plug. Where does the oil for the gears go? Plus the bottom gearbox cover screw wont go in. It's also missing the dowel that lines it up on the inside. that is probably the reason it won't go together. My dilemma  is since the covers were all chromed (poorly) do I buy a later gearbox cover and chrome it? At that point I'd probably want to re-chrome the  others since their already pealing. Remind me to never buy someones halfway finished projects ever again...


Thursday, January 6, 2011

Trying to shoehorn the engine back in the Bonnie

I wrestled the motor into the frame while on it's side. I couldn't seem to get the front engine mounts to line up with the bolt hole in the engine, so I attached the back side brackets loosely and righted the bike. Still no luck. I got the engine tightened up hoping the back side brackets would line up the front but still no luck. I loosened all the mounting bolts to see if I could wiggle the engine into alignment and guess what... No dice. This is probably a two man job. After 2 hours of sweating and swearing, I called it a night. The motor looks nice back in the frame though!


Friday, December 31, 2010

TriBSA Update

I'm feeling a little in over my head with the tuning of this motor. I've decided to scale back a bit, start with a solid running, fine tuned, Pre unit engine and make it fit the frame. Tricking out the engine will come, possibly on the second 650 motor I have cases for. That way I can do the heavy mods and possibly do billet con rods new crank and do it right from the ground up. It's going to take a lot of time and money - both of which I don't have much to spare at this moment.

This morning I took my barrels over to a local machinist who specializes in performance engines. My neighbor Woody knows him from way back and is having him do the total engine rebuild on his A10. I am having the one hole in the engine case repaired (its right where the dynamo attaches. They are also boring the cylinder out to fit the .06 oversize pistons. Hopefully I'll have those back in the near future...


Thursday, December 30, 2010

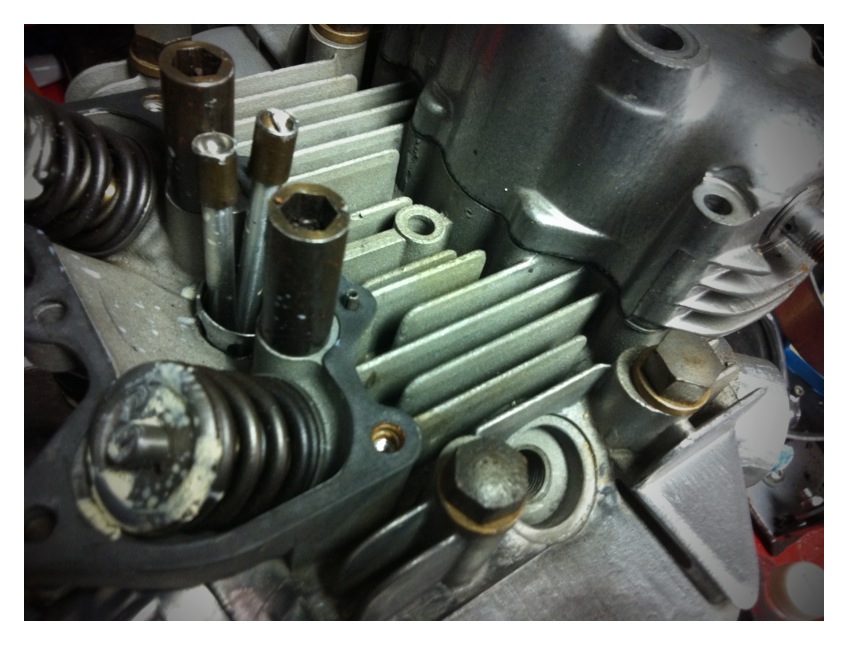
Push Rods are in, clearances are set

After wrestling with seating the push-rods into the tappets for another half hour, I finally got them in. I reset all the bolts to 10lbs of torque and set my valve clearances to .05mm inlet and .10mm exhaust. Gaskets are en-route, so once they arrive I can button the engine up, and reinstall it into the frame.

Wednesday, December 29, 2010

Dealing with the known problems

One of the issues I discovered back in the summer right before I parked this project, was the fork stanchions were mangled and stripped at the top, preventing the fork nuts from catching a thread. I ordered new stanchions but never installed them because right after that I found the sand in the oil reservoir. I laid everything out, pulled the guts out of the old stanchions, assembled the new set but decided new fork seals were in order. I ordered them as well as a handful of other bits I need to finish this bike up. The other issue was in the inlet rocker box. One of the push-rods was not seated on the tappet. I pulled the cover off and found the push rod wedged between the tappet and the base of the tube. There was also a nice gouge in the metal rocker cover which I ground down to avoid rubbing against the rocker arms. These things are a pain in the rear to get back together. The BSA A65 is so much easier to see what your doing. I successfully got the push rod into place but not before the other jumped out. I decided to call it a day since it was getting late and the dogs needed dinner.


Tuesday, December 28, 2010

Triumph Bonneville Update

I bought this bike back in April of 2010. It was advertised as a 99% complete restoration. Powder coating, chrome, rebuilt engine, just needed a seat and a few bits to get it finished. The guy said he needed money and at 2500, it seemed like a steal. I saw it at night and it looked great...

Over the next few days I found chipped and peeling chrome, chipped and "orange peeled" powder coat, areas where grey powder was used without cleaning the black out of the gun leaving a dirty look to the finish etc... After finding the oil reservoir was full of sand blast grit, this project went on the back burner. I tried and tried to flush the sand out of the frame but it just kept coming. This week I've had some time off so I broke down the bike, pulled the engine and did what I should've done from the get go, a complete teardown and rebuild. I flushed the frame with an auto-parts washer at different angles for 24 hrs, than rinsed it with water until I didnt see anything coming out of the frame. After that I rinsed it another 5 times. I quickly dried it with compressed air to avoid rust and it's ready to go.

As for the frames powder coat,I decided to touch up the areas by removing any rust from the bare spots with sand paper, cleaning with acetone, and using some gloss black touch paint and clear coat. Its barely noticeable and I'm so over the fact that this isn't the show bike I thought i was buying last spring. 


Monday, December 20, 2010

using the lathe to make longer fork bushings

This is for the speed twin. I want to compress the forks slightly to keep the frame angle the same with the new 21" front wheel as it was with a 19" front wheel. The lathe is old and i'm still learning how to use it, but this bushing has taken 8 hours to turn so far. It's almost done, but theres got to be a faster way.