Wednesday, March 10, 2010

Took her out for a spin


Lots of oil leaks at seals and a loose gear shift lever, but otherwise she had some power. I'll get into all the problem areas next post. My brother in law, John, took this pic. He has a great blog called tikaro.com and he also has a 74 BMW with a side car.

Uploaded by www.cellspin.net


Sunday, March 7, 2010

Bike buttoned up and running again


The headers are so banged up and cracked that I just fitted them on without sealent so they'll come off easy when my new set arrive. So despite the smoke pouring out of the exaust, the engine ran strong. I feel much better knowing my head gaskets set.

Uploaded by www.cellspin.net


Saturday, March 6, 2010

Torque nuts and bolts in propper order


After annealing the head gasket, I replaced the cylinder head and loosely screwed down all nuts and bolts in the order specified by the shop manual (see above picture.) It's crucial too crank them down a little at a time or it can seat incorrectly. In a zig zag fashion started with the center bolt and gradually adjusted them to 31-33 lbs each. Failing to do them in order or proper torques can lead to uneven pressure on head gasket. This of course can lead to leakage and/or a blowout.


Once the torques were set, I replaced the push rods. Starting with the two shorter rods which connect the outer tappets to the intake rockers (see picture below). The longer rods were placed on the center two tappets and connected to the exhaust rockers. At this point I was called in for dinner. We had dinner guests coming and I needed to shower up. Tomorrow I'll adjust the valve clearance and put a new gasket on the rocker cover and hopefully fire her up!

Annealing copper head gasket


Annealing copper softens the copper up so that it won't break or crack. Any bending or movement of the gasket will stiffen the copper and make it brittle, so annealing is necessary every time the gasket is changed.

This video is a bit shaky because I was recklessly recording with my iPhone in one hand and a torch in the othe. It is also cut short. What you don't see is the copper reaching a dull red glow before I doused it in a bucket of water.


Friday, March 5, 2010

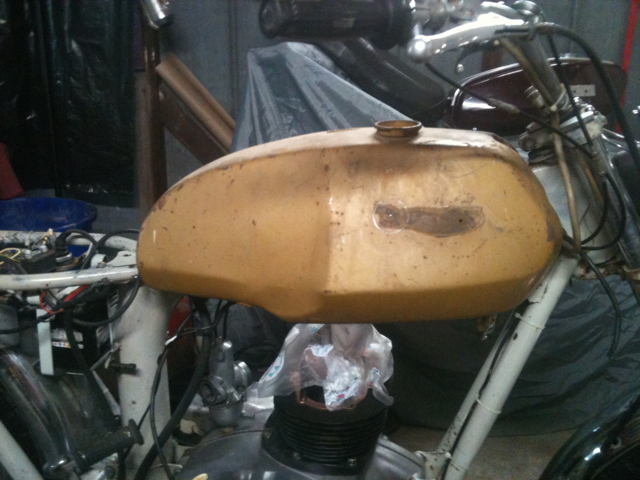
Lots of bondo under paint


Seems that the "dent free" tank I just purchased from ebay was once full of dents. All I can do is strip eveything, try to push out what I can, and refill the deep dents and see how it looks.

Paint stripper applied


Now for some serious elbow grease! I think the lines on this tank make the bike look so much tougher. The finish has still yet to be determined.

Uploaded by www.cellspin.net


New 4 gal. tank has arrived


I decided to upgrade the standard 2.5 gal. tank to the bigger size. This is actually a triumph tr7 tank but they're the same with exception to the petcocks location. The tank has a little rust but no dents. Time to strip the paint and clean the interior...

Uploaded by www.cellspin.net